Spring Tulip Wreath Instructions
Spring is in full bloom! Add some color to your door with this colorful and cheery Tulip Wreath! Here’s a fun and easy wreath to make! All you need are a few simple materials and a little time create something beautiful!
note this post contains affiliate links
Difficulty Level – Beginner
Time to Complete – About 1 Hour
Age Range – 12 and up but younger kids can help with an adult.
Supplies Needed
Floral Metal Garden Wreath Form

Floral Wreath Instructions
Follow these instructions to make your own Tulip Wreath. You should be able to complete this project within an hour.
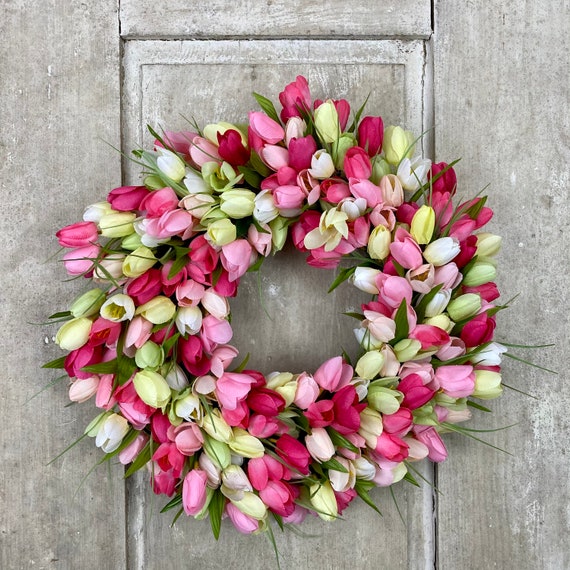
How to Make a Tulip Wreath-tulip Wreath INSTRUCTIONS DIY
Step 1 – Wrap the Wire Frame
Faux tulips can become heavy when they are layered together, start your project with a wire wreath form and wrap the wreath form with a 2 inch ribbon. Use a color that coordinates with the tulips that you are using. Secure the ribbon with a hot glue gun as you wrap, but don’t trim the end – you will be continually wrapping the wreath form and flowers as you go. Be sure to carefully layout your wreath before starting to prevent any issues.
Step 2 – Prepare the Tulips
To cover your entire wreath you will need approximately 20 bunches of mini tulips. Less if you are using large tulips. Make your own tulip bunches by gathering several stems and using floral wire to secure them together. Before you start lay the tulips over top your wreath form to make sure that you have enough to completely cover the wreath.
Step 3 – Layer and Secure the Tulips
Once you have enough tulip bunches, lay a bunch down where you have already wrapped the ribbon. Next, take the remaining ribbon and wrap it around the stems of the bunch of tulips and secure them with the hot glue gun. After your first bunch of tulips are secured and wrapped, lay the second bunch over the first bunch of tulips and cover the exposed ribbon. Wrap the stems and secure with the glue gun. Continue to wrap, layer and glue the tulips all the way around the wreath.
Step 4 – Finish up and add the Tulips
Once you have reached the second to last bunch of tulips, finish wrapping the ribbon around the wreath form until it reaches the star of the wreath. Cut ribbon and secure the ends with the hot glue gun. The wreath will almost be covered completely with tulips with a small portion of the wrapped wreath form showing. Trim the last bunch of tulips so that the end or stems are short. Next, tuck them under the first batch to cover up the remaining ribbon. Secure with hot glue. You wreath should be covered with tulips at this point.
Step 5 – Add a Wreath Hanger
One your wreath form is covered in tulips, carefully lift the wreath and hold it vertically to make sure that the bunches stay in place. Secure any loose pieces with glue as necessary. Make a small slit in ribbon on the back of the wreath form. Insert a piece of floral wire into the cut slit and twist it around the exposed wire wreath until you have a loop. You now have a a way to easily hang up your wreath anywhere on your house or on a door. If you want to store your wreath cover it with a plastic bag and hang it in a safe area like a closet.