Crochet Baby Granny Square Afghan Pattern (Crochet)
How to Crochet a Granny Square Afghan
In the world of crafting, few projects exude the same timeless charm and cozy warmth as a granny square afghan. These classic blankets are not only practical but also a delightful way to express your creativity. Whether you’re a seasoned crocheter or a novice looking to embark on a new hobby, crocheting a granny square afghan is a rewarding endeavor that yields beautiful results. In this guide, we’ll take you step-by-step through the process of creating your own granny square masterpiece.
Materials Needed: Before diving into the crochet world, it’s essential to gather all the necessary materials. Here’s what you’ll need to get started:
- Yarn: Choose your favorite colors and textures. Worsted weight yarn is a popular choice for afghans due to its versatility.
- Crochet Hooks: Select a hook size that complements your yarn choice. Typically, a size H/8 (5.00mm) or I/9 (5.50mm) hook works well for afghans.
- Scissors: A sharp pair of scissors will come in handy for cutting yarn.
- Yarn Needle: Used for weaving in loose ends and sewing squares together.
- Optional: Stitch markers, if you find them helpful for keeping track of your stitches.
Step 1: Start with a Chain: To begin your granny square afghan, create a foundation chain. The length of this chain will determine the size of your afghan. Make sure it’s long enough to accommodate the desired width.
Step 2: Work the Center: Once you have your foundation chain, form a ring by slip stitching into the first chain. This ring will serve as the center of your granny square. Work a few chains to build height, then crochet a series of stitches into the ring. Traditionally, this involves a combination of double crochet stitches, chains, and clusters.
Step 3: Create the First Round: Continue crocheting around the center ring, working a set of stitches into each corner to form the square shape. The classic granny square pattern typically involves clusters of stitches separated by chain spaces. Work three double crochet stitches into each corner to maintain the square shape.
Step 4: Repeat and Expand: To grow your granny square, repeat the pattern of clusters and chain spaces for additional rounds. Each round will increase the size of your square. As you work, you’ll notice the distinctive “granny” texture emerging.
Step 5: Joining Squares (Optional): If you’re making a multi-square afghan, you’ll need to join your squares together. There are various methods for doing this, including slip stitching squares together or sewing them with a yarn needle. Experiment with different techniques to find the one you prefer.
Step 6: Finish with a Border: Once your granny square afghan reaches the desired size, add a border to give it a polished look. You can choose a simple single crochet border or get creative with decorative stitches. Consider using a complementary color to make the border stand out.
Crocheting a granny square afghan is a timeless craft that brings joy and warmth to any home. Whether you’re making it for yourself or as a heartfelt gift for a loved one, the process of creating each square and watching your blanket come together is truly special. With a bit of patience and practice, you’ll soon have a cozy masterpiece to cherish for years to come. So gather your yarn and hooks, and let the crocheting adventure begin!
Free Granny Square Crochet Blanket Pattern
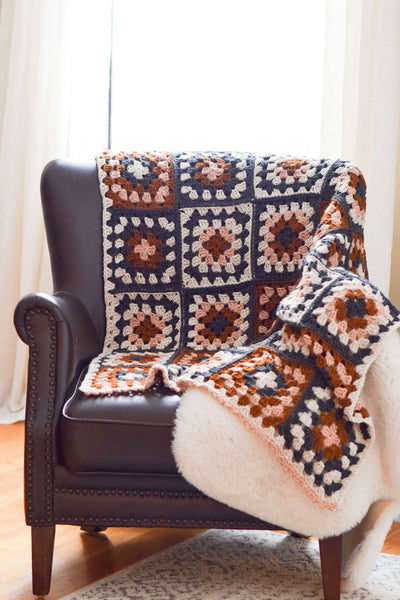
Crochet Kit – Nora Granny Square Throw

Monkey Huggie Blanket Using the Crochet Granny Square Technique
101 Granny Squares Crochet Pattern Book
A book filled with easy to the more difficult granny square pattern. Make them large or small!


