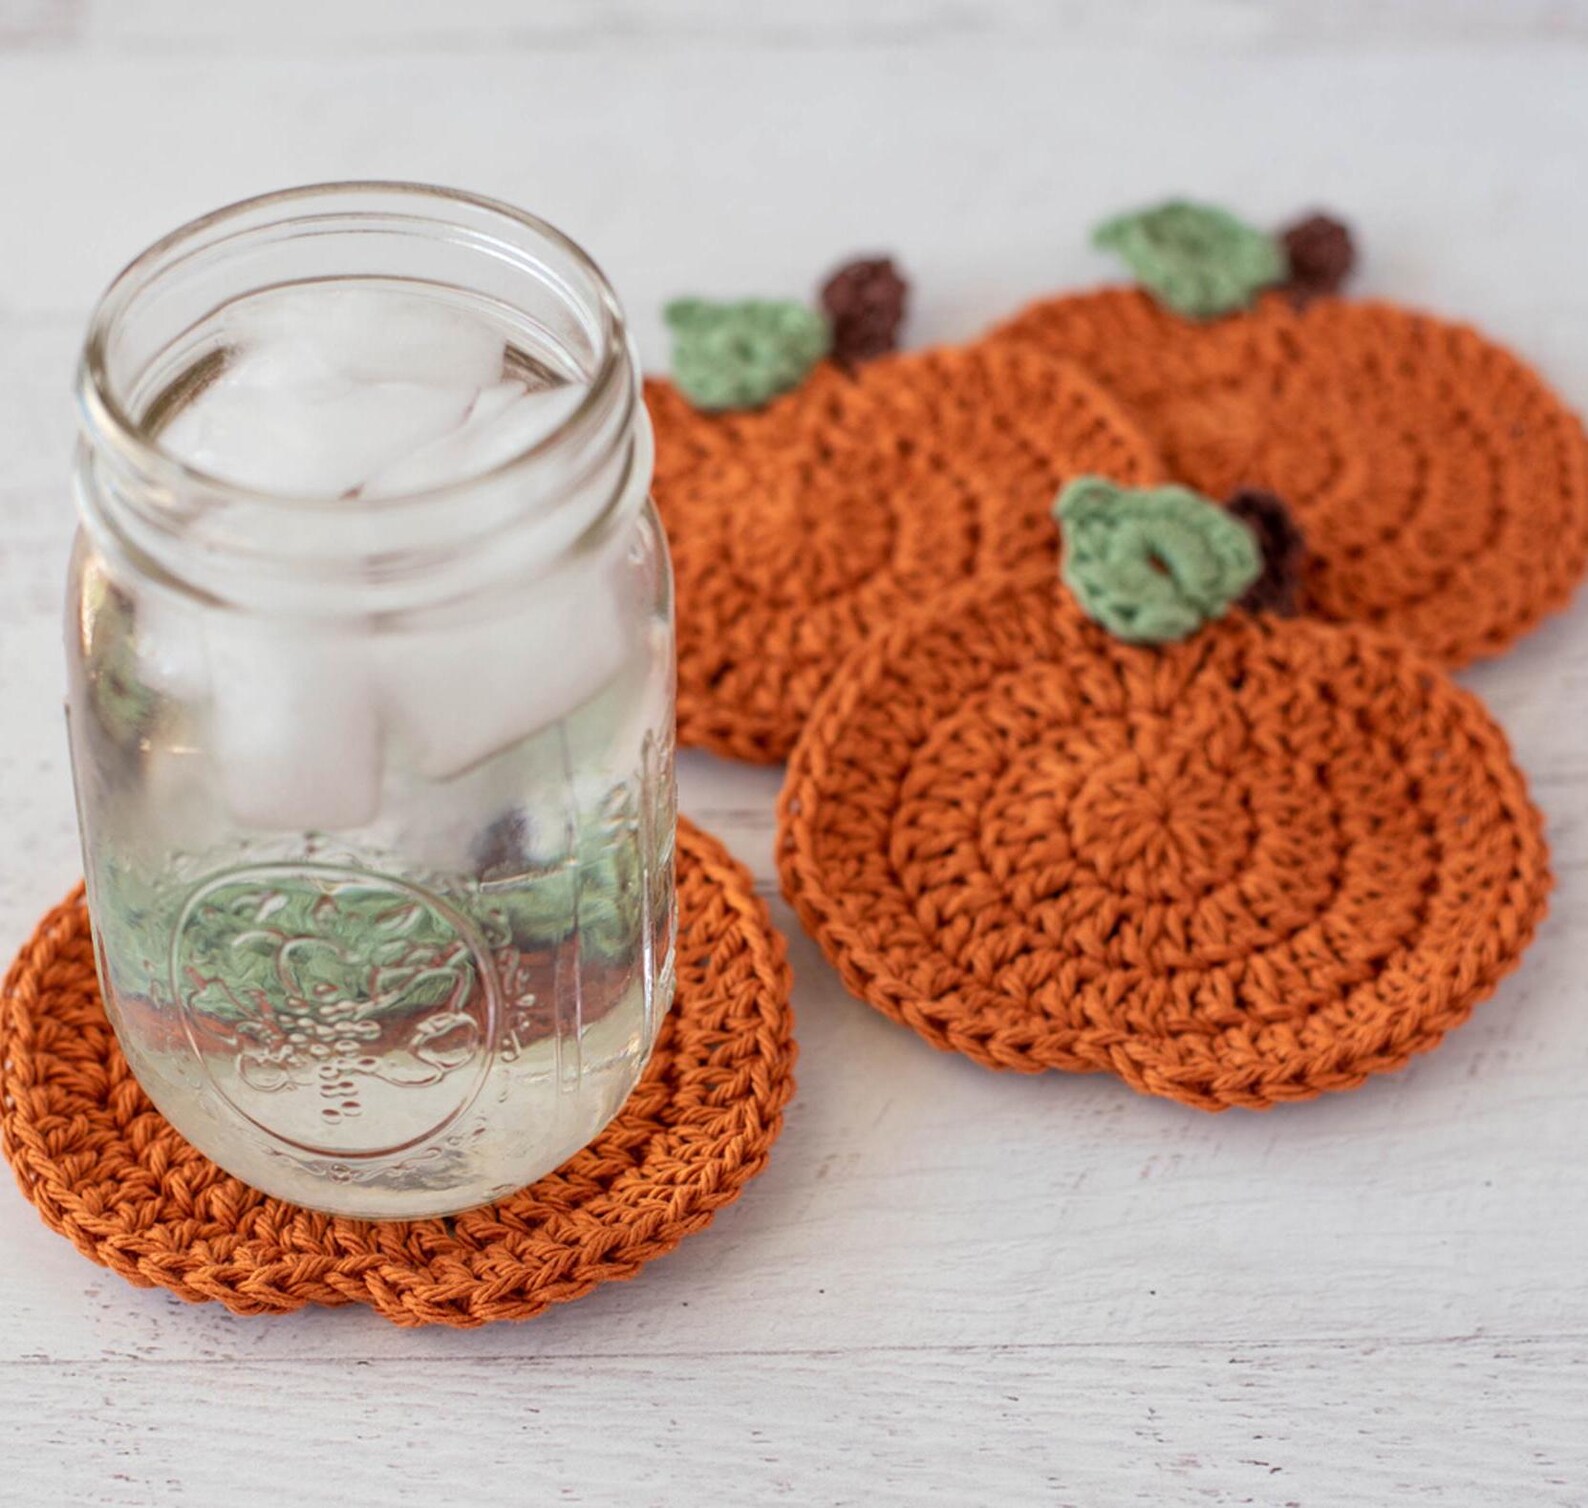
Free Crochet Pumpkin Potholder Pattern
Add a handmade touch of fall to your kitchen with this Crochet Pumpkin Halloween Potholder Pattern! This pattern is beginner-friendly so you can whip up one or an entire set in an evening. Use them as a creative way to decorate in your kitchen.
note this post contains affiliate links
Crochet Pumpkin Potholder Pattern
Note this pattern is for Decoration. If you want to use as a Potholder Use Cotton yarn and DO not Use Felt for the face. Perfect for adding cozy farmhouse vibes to your fall decor,
or for gifting to friends and family who love autumn!
You can Download the PDF Pattern Here for Free
I would suggest using cotton yarn if you’re going to use this as an actual potholder. Worsted Weight yarn is what the pattern calls for but it’s not suggested for using with heat.
Skill Level: Easy (Advanced Beginner)
Materials Needed:
I would suggest using cotton yarn for this project if using as a potholder and not a decoration. Worsted Weight Yarn may not work well with hot items.
Worsted Weight or Cottn Yarn Orange 70 yds * Green 5 yds
Crochet Hook Size G or 4.00 mm
Black Felt 5″ x 5″ or use Black Yarn to Sew on Eyes and Mouth
Yarn needle
Scissors
Stitches & Abbreviations:
ch – chain
sc – single crochet
dc – double crochet
mr – magic ring
sl st – slip stitch
Start Crocheting the Pattern

Back of Pumpkin
Rnd 1: (right side) With Orange, ch 4, 11 dc in fourth ch from hook; join with slip st to top of beginning ch: 12 sts.
Note: Loop a short piece of yarn around any stitch to mark last rnd as right side.
Rnd 2: Ch 3 (counts as first dc, now and throughout), dc in same st, 2 dc in each dc around; join with slip st to first dc: 24 dc
Rnd 3: Ch 3, 2 dc in next dc, (dc in next dc, 2 dc in next dc) around; join with slip st to first dc: 36 dc.
Rnd 4: Ch 3, dc in next dc, 2 dc in next dc, (dc in next 2 dc, 2 dc in next dc) around; join with slip st to first dc: 48 dc.
Rnd 5: Ch 3, dc in next 2 dc, 2 dc in next dc, (dc in next 3 dc, 2 dc in next dc) around; join with slip st to first dc: 60 dc.
Rnd 6: Ch 1, sc in same st, slip st in next dc (top of pumpkin), sc in next dc, dc in next dc, 2 dc in next dc, (dc in next 4 dc, 2 dc in next dc) around; join with slip st to first sc, finish off: 72 sts


Front of Pumpkin

Front: Work same as back, do not finish off.
Joining: With wrong sides together, front facing, matching sts, and working
trough both loops of both pieces; slip st in same st and in next 2 sts, sc in each
dc around; join with slip st to first st, finish off.
Stem: With green, ch 20 loosely; dc in fourth ch from hook and in each ch across;
finish off leaving a long end for sewing.
Thread yarn needle with end; fold stem in half and sew ends to top of pumpkin.
Cut out your black felt for making face of pumpkin and glue with glue gun to front of pumpkin. Get creative and crochet a face if you prefer!